


Blog
How to Install a Ductless Mini Split AC in Your Home: A Complete Guide
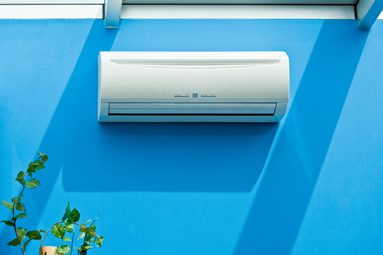
Mini splits are increasingly popular in Minneapolis and St. Paul for their energy efficiency and ability to handle extreme Minnesota temperatures. These heating systems don’t require ductwork, which solves a variety of home heating problems.
Homeowners often wonder whether they can handle ductless mini split installation themselves or need a professional. This guide covers the full installation process, the tools you'll need, and when DIY makes sense versus calling the experts at Total Comfort.
Understanding What You’re Installing
A ductless mini split system has three main components: the outdoor condenser, indoor air handler, and the line set that connects them. Mini splits use this heat pump technology to provide both heating and cooling year-round.
Some homeowners install single-zone systems, meaning one indoor unit, and some install multi-zone systems, meaning multiple indoor units on one outdoor condenser. Some brands like MRCOOL offer DIY-friendly systems with pre-charged, quick-connect line sets, but most traditional systems require specialized tools. This may include vacuum pumps, flaring tools, and EPA certification for refrigerant handling.
Choosing the Right Location for Your Units
Place units 6-7 feet above the floor on a sturdy wall, with specific clearance requirements from the ceiling and adjacent walls. Don’t place units above beds, seating areas, or anywhere where direct airflow could cause discomfort. Placement should allow the unit to distribute air effectively throughout the space.
Install the outdoor unit on a level concrete pad or wall-mount bracket with adequate clearance for airflow. Proper AC installation in Minneapolis requires protecting the outdoor unit from prevailing winds and heavy snow accumulation during winters. Keep the indoor and outdoor units on the same wall, or as close as possible, to minimize refrigerant line length. Most DIY kits include up to 25 feet.
Gathering Your Tools and Materials
These are the tools the reader may need:
- Power drill
- Level
- Hole saw
- Stud finder
- Torque wrench
- Wire strippers
- Electrical tape
- Multimeter
- Pipe insulation
- Silicone sealant for weatherproofing
DIY-friendly systems may eliminate the need for vacuum pumps and flaring tools. Since traditional systems require specialized tools and certifications, DIYers should stick to pre-charged systems.
Step-by-Step Installation Process
Replacing your AC with a mini split isn't simple, but following these steps helps novice installers navigate setup.
Mounting the Indoor Unit
Use a stud finder to attach the mounting plate to the wall and ensure it’s level. Methods usually include drilling the penetration hole through the exterior wall at a downward angle to prevent rainwater entry.
Feed all lines and wiring through the hole and connect the drain hose to the unit’s drain port. Make sure the hose slopes continuously downward to prevent water backup. Last, attach the indoor unit and double-check all connections.
Installing the Outdoor Unit
You’ve already chosen a good location. Now follow these steps to install the outdoor unit, and consider hiring a professional if you don’t have experience working with refrigerants and electrical wiring.
- Connect the Lines: Connect pre-charged pipes and tubing from the indoor unit according to the manufacturer’s instructions. Never cut pre-charged lines, as escaping refrigerant can cause injury.
- Secure the Connections: Fasten the wires and tubing to the exterior wall and add covers for a cleaner appearance.
- Complete the Hookup: Connect the line set to the correct pipe joint on the outdoor unit, then connect the multi-conductor wiring from the indoor unit.
Electrical Connections
It’s best to hire a licensed electrician to power the unit. This typically involves running a 220-volt, or sometimes 120-volt, line from the breaker panel to a disconnect switch, then connecting the switch to the unit.
An electrician will follow local electrical codes in Minneapolis and St. Paul and verify all connections before powering up.
Final System Setup and Testing
For traditional systems, evacuate the unit with a vacuum pump to remove air and moisture from the refrigerant lines before use. A professional should complete this step, but most DIY systems don't require evacuation.
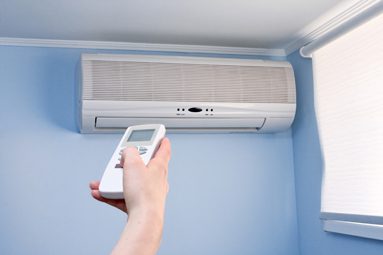
Your final step is powering up the unit at the breaker panel and using the remote to test all functions: cooling, heating, fan speeds, and swing modes. While you inspect the unit, check for unusual noises and feel the airflow to ensure it’s strong and consistent.
Common Mini Split Installation Mistakes to Avoid
Small mini split installation mistakes can reduce efficiency, cause leaks, or damage your unit/home. Avoid these common problems:
- Improper Drainage: The drain hose should slope downward so condensation can flow outside.
- Loose Refrigerant Connections: Use a torque wrench to tighten refrigerant line connections to the manufacturer’s specifications. Hand-tightening can lead to refrigerant leaks.
- Poor Indoor Unit Placement: Leave the manufacturer-required clearance around the unit. Installing it too close to the ceiling can restrict airflow, and placing it too low can cause uneven temperatures.
- Restricted Outdoor Airflow: Keep the outdoor unit the required distance from walls and obstructions so it can release heat effectively.
- Installing Systems that Require Refrigerant Work: DIYers should stick to systems specifically designed for DIY installation with pre-charged lines.
When to Call a Professional HVAC Contractor for a Mini Split Installation
There are many reasons to schedule professional mini split system installation in Minneapolis. If your existing cooling system is aging or no longer meeting your needs, an AC replacement may also be worth considering.
Always call a professional in these cases.
- Multi-zone systems
- Professional installation required for warranty coverage
- Challenging wall construction, including brick, stone, plaster, and lath
- Long refrigerant line runs over 25 feet
- High-voltage electrical work
Why Total Comfort Is Your Trusted Twin Cities Ductless Mini Split Installer
Total Comfort is a licensed HVAC provider serving Minneapolis, St. Paul, and the Twin Cities metro area. We understand Minnesota’s extreme climate and install systems designed to handle -20°F winters and 90°F+ summers. Our technicians perform thorough load calculations to ensure proper sizing and handle everything from site selection and electrical work to refrigerant charging and system testing.
Total Comfort provides comprehensive and ongoing AC services in the Twin Cities.
Schedule Online